Introduction
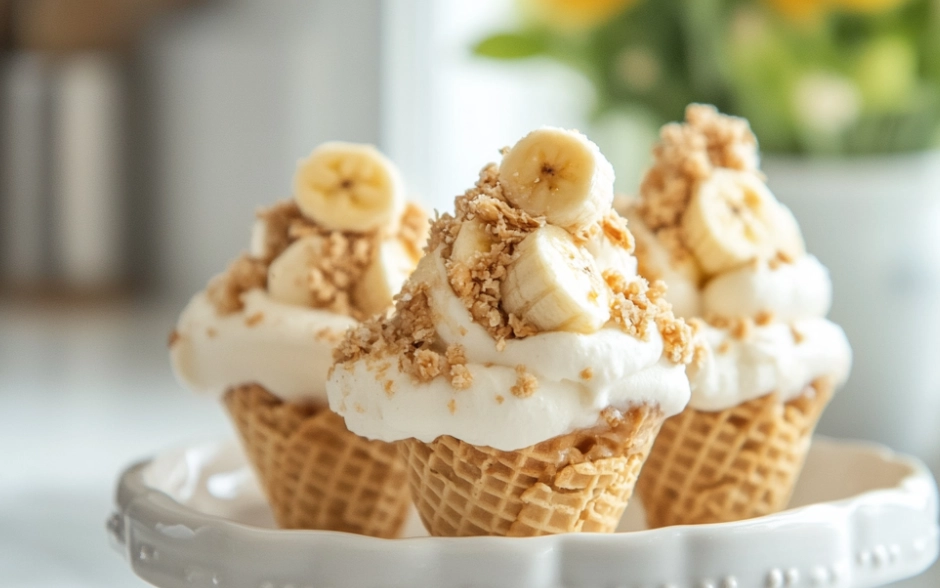
Banana Pudding Cheesecake Cones are a delightful and creative twist on classic banana pudding, packed into crispy waffle cones for a handheld treat. This no-bake dessert combines layers of velvety cheesecake filling, creamy banana pudding, and crushed vanilla wafers to create a portable indulgence perfect for parties or special occasions.
With its playful presentation and irresistible flavor, these cheesecake cones are a surefire hit for both kids and adults. Whether you serve them at a summer gathering or as a fun family dessert, they’re easy to make and guaranteed to impress!
Ingredients for Banana Pudding Cheesecake Cones
For the Cheesecake Filling:
- 8 ounces cream cheese, softened
- ½ cup powdered sugar
- 1 teaspoon vanilla extract
- 1 cup heavy whipping cream, cold
For the Banana Pudding:
- 1 package (3.4 ounces) instant banana pudding mix
- 2 cups cold milk
For Assembly:
- 6-8 waffle cones
- 1 cup crushed vanilla wafers
- 1-2 bananas, sliced
- Whipped cream, for topping (optional)
- Additional crushed vanilla wafers, for garnish
Directions
- Prepare the Cheesecake Filling:
- In a large mixing bowl, beat the cream cheese and powdered sugar until smooth and creamy.
- Add the vanilla extract and mix well.
- In a separate bowl, whip the heavy whipping cream until stiff peaks form.
- Gently fold the whipped cream into the cream cheese mixture until fully combined. Set aside.
- Make the Banana Pudding:
- In a medium bowl, whisk together the instant pudding mix and cold milk for about 2 minutes until thickened. Refrigerate for 5-10 minutes to set.
- Assemble the Cones:
- Start by adding a spoonful of crushed vanilla wafers to the bottom of each waffle cone.
- Add a layer of cheesecake filling, followed by a layer of banana pudding.
- Repeat the layers, alternating between crushed wafers, cheesecake filling, and banana pudding, until the cone is filled.
- Add the Final Touches:
- Top the cones with a dollop of whipped cream, a slice of banana, and a sprinkle of crushed vanilla wafers for garnish.
- Chill and Serve:
- Refrigerate the assembled cones for 1-2 hours to firm up before serving. Serve chilled and enjoy!
Servings and Timing
- Servings: 6-8 cones
- Prep Time: 20 minutes
- Chill Time: 1-2 hours
- Total Time: 1 hour 20 minutes
- Calories: 340 kcal per cone
Variations of Banana Pudding Cheesecake Cones
- Chocolate Lovers: Drizzle the cones with melted chocolate or add chocolate chips to the layers.
- Berry Twist: Substitute banana slices with fresh strawberries or blueberries for a fruity alternative.
- Gluten-Free: Use gluten-free waffle cones and vanilla wafer alternatives for a gluten-free version.
- Caramel Banana: Add a drizzle of caramel sauce between the layers for a richer flavor.
Storage/Reheating
- Storage: Store assembled cones in the refrigerator for up to 2 days. To prevent sogginess, keep the waffle cones separate from the fillings and assemble just before serving.
- Freezing: Cheesecake filling and banana pudding can be frozen separately in airtight containers for up to 1 month. Thaw in the refrigerator before assembling.
10 FAQs
1. Can I use homemade banana pudding instead of instant mix?
Yes, homemade banana pudding works wonderfully for this recipe. Ensure it’s fully cooled before layering.
2. What if I don’t have waffle cones?
You can use sugar cones, small mason jars, or even clear cups for layering.
3. How can I keep the waffle cones from getting soggy?
Assemble the cones just before serving, or line the inside with a thin layer of melted chocolate to create a barrier.
4. Can I make this recipe ahead of time?
Yes, prepare the fillings in advance and store them in the refrigerator. Assemble the cones close to serving time.
5. Can I add nuts to the recipe?
Chopped pecans or walnuts make a great addition to the layers or as a garnish.
6. What’s the best way to transport these cones?
Stand the cones in a muffin tin or use a cone holder to keep them upright during transport.
7. Can I use other fruits?
Absolutely! Kiwi, mango, or mixed berries can be delicious substitutes or additions.
8. Can I make these cones dairy-free?
Use dairy-free cream cheese, non-dairy whipped topping, and plant-based milk for the pudding.
9. How do I prevent the banana slices from browning?
Toss the banana slices in lemon or pineapple juice to keep them fresh and prevent discoloration.
10. Can I use a flavored waffle cone?
Yes, chocolate or caramel-flavored waffle cones add an extra layer of flavor to the dessert.
Conclusion
Banana Pudding Cheesecake Cones are a show-stopping, no-bake dessert that’s as fun to make as it is to eat. Their delightful combination of creamy layers, crunchy waffle cones, and refreshing banana flavor makes them a versatile treat for any occasion. Try them for your next gathering, and watch them disappear in no time!
This post may contain affiliate links. Please read our disclosure policy.

If you love this recipe, please consider giving it a star rating when you leave a comment. Star ratings help people discover my recipes online. Your support means a lot to me, I appreciate you.